


For the past few months, we’ve noticed that more and more hybrid and EV owners are booking professional dash cam installation services here in our Richmond office. From the Audi Q4 E-Tron, BMW i8, Tesla S, Volkswagen Taos and more, we’ve had the chance to get them set up for driving safety with dash cams.
How to Install a BlackVue DR970X Plus 2-CH and PowerCell 8 in a 2023 BMW iX
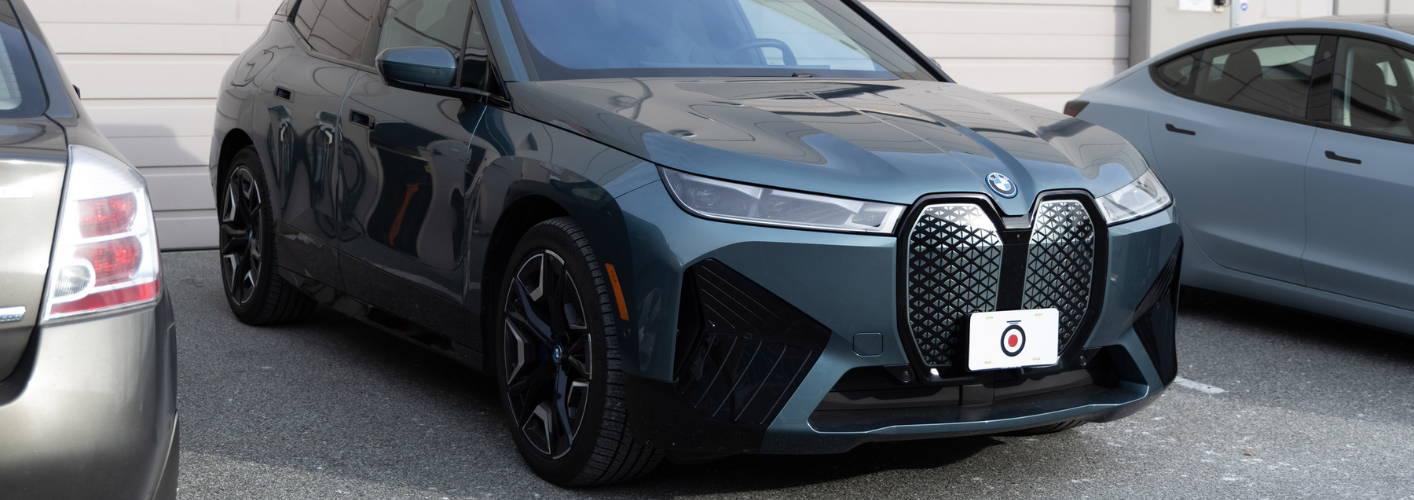
We’ve just had the opportunity to add another new and fresh model to the list. In this blog, we will show you how to install a two-channel dash cam in this electrifying vehicle model, the 2023 BMW iX. This vehicle is rather unique, so we’ll be doing some special processes for it, which will apply to many other BMWs. This includes addressing delayed ACC fuses, odd fusebox locations, a tight frame, and metal hatchback connectors. Check out our dedicated page here for general advice on wiring into BMWs.
For this premium vehicle, we are installing a suitable sleek and high-end model to match—the BlackVue DR970X Plus 2-CH. This unit excels at matching the sleek and professional look of the BMW iX while offering top-tier 4 K footage through its Sony STARVIS 2. Despite the BMW iX’s pre-existing built-in camera, it’s no surprise they’re opting for a dedicated dash cam, ensuring much higher quality protection, more features, and coverage when the vehicle is off through the PowerCell 8 Battery Pack.
To make this process simpler and more convenient, we’d also recommend the BlackboxMyCar Essential Installation Kit, as it’ll contain all the necessary tools you need if you’re installing a dash cam yourself for the first time. Every package includes a BlackboxMyCar Circuit Tester, a Trim Removal Tool, Zip Ties, a Microfibre Towel for wiping the windshield before mounting, and something new – our exclusive BlackboxMyCar Decals! Just something to remind other drivers that this vehicle is protected!
Installing a dash cam yourself?
Ensure your dash cam is installed correctly with our Essential Dash Cam Installation Kit. This user-friendly package makes installation easy and hassle-free, allowing you to drive with confidence.
Don't settle for less—protect yourself on the road with our top-quality installation kit today!
Sold out
Step 1: Mounting the Front Camera on the windshield
The first step is deciding the best location to mount a front camera; our recommendation is to conceal the dash cam from the driver's view behind the rearview mirror on the passenger side. For this vehicle, we put the mount on the passenger side, and then had the lens directly in the center, underneath the center console.
Before mounting the camera, please clean the windshield first - you don’t want your footage to be blurry with dust, or the mount not adhering properly. Use a microfibre towel and a window cleaner on the inside and outside of the windshield. Remove any marks or smears that may impact your footage's video quality on the outside too. After cleaning the windshield, power the unit through its plug-and-play Cigarette Lighter Adapter to check the live view and determine the optimal viewing angle for the camera. When you’ve decided on the proper place for the unit, carefully remove the adhesive covers from the camera’s mount, fix the camera to the windshield, and hold it in place firmly.
Step 2: Wiring to the Fusebox
Now, locating and wiring to the fusebox is where things get rather unique for this 2023 BMW iX. There are 2 fuseboxes, one more easily accessible behind the side panelling in the trunk, and another, embedded beneath the vehicle's center console. We went with the front fusebox to allow for a shorter cable length and cleaner installation.
This front fusebox is entirely buried, so we had to remove a lot of panelling, including much of the floor panelling on the passenger side, along with the trim panelling. Now that the fusebox is uncovered, we can start finding a suitable fuse. This is where we encountered another issue, as this entire BMW iX’s fusebox stays hot when the vehicle turns off. We found that the entire fusebox stayed hot for ~15 minutes, meaning we had to leave the vehicle open and turned off before returning to the vehicle after the delay for testing.
After this wait, we could test each individual fuse with our circuit tester, searching for a fuse that is not on, an ACC connection that only turns on with the vehicle’s ignition, as the Battery Pack only needs a 2-wire connection, with an ACC connection and a Ground. While a true ACC connection is ideal, we had to settle with one of the delayed ACC connections, as the entire vehicle would remain on for those 15 minutes. To compensate, we set the battery pack’s power draw to low, and the BlackVue’s parking mode will engage after 5 minutes based on the vehicle's movement, further minimizing the power draw. Once a proper fuse is found, use one of your Add-a-fuses in the applicable slot. This BMWiX uses both Low-Profile and ATO fuses. We chose to wire to a 20Amp ATO fuse.
For general advice on hardwiring, please check out our recent in-depth tutorial on the hardwiring process for detailed information on how to wire it yourself.
After we’ve wired to the correct fuses, there’s still the matter of placing the battery pack. While placing the battery underneath the passenger or driver’s side seat is ideal, there wasn’t enough space for us to do so. Instead, we placed the battery underneath the carpet and floor panelling, taking these out. Then, making sure it’s nice and snug, we ensured it stayed in place with the double-sided velcro adhesives included.
Step 3: Running the front camera cables
For the third step, it’s time for the wires. Run your power cable from the fusebox up to the front dash cam. You’ll need to remove the side panelling and route it up to and through the A-pillar, across the headliner, and to the dash cam. For this install, we simply followed some stock cabling up that A-pillar, and everything went smoothly. Remember, make sure it’s not blocking any airbags, either avoiding them or running behind them.
Running across the A-pillar to the headliner, it should be smooth sailing over to the camera, as the lip of your headliner should be very easy to tuck the cable into. Since we are running up the passenger side, and mounting to the passenger side as well, we won’t need to wire past the center console. Next, plug in the camera, and the front cam is finished!
Step 4: Wiring the Rear Camera
Next, we move on to the rear camera. You’re going to need the rear connecting cable here. Plug the rear connecting cable into the front unit, run the cable along the headliner, and straight across the length of the car past the A, B, and C pillars. To get past the B and C pillars, we wedged in our pry tool along the trim and easily slid the cable in, repeating this all along the way to the rear of the camera itself. The BMW’s frame is relatively tight, as is normal for European vehicles. BlackVue’s thin cables should help to compensate, and with some patience and the right tools, you’ll make it there.
Then, it’s time to mount the rear camera itself. Since this is a hatchback, we’re going to need to mount to the rear window and up the side connectors. While most vehicles have a rubber grommet and piping going between the main vehicle and the rear hatch, the BMW iX does things differently. Instead, they have two metal connector beams with plastic coverings. You’ll need to unscrew these plastic coverings and then run the cable along the metal connector beams.
Next, install the rear camera on the windshield, right at the center. It should not be installed with the rear defroster lines blocking its view. If you want to check the angles again, we recommend using the camera's in-app live view to make sure the rear view is as clear as possible.
Of course, after the mounting and wiring, test the BlackVue DR970X Plus 2-CH to ensure it works properly. Turn on the car and check if the dash cam turns on automatically, as well as noting if it goes into parking mode when the car is off, which will need to be enabled in the settings of the Thinkware app. If it doesn't turn on, check the power connections and make sure the dash cam is properly mounted. Beyond that, ensure everything is nicely put back and tucked away, closing up the side panels to the fusebox and rear panels. Wrap up any excess cabling, and put it in the headliner.
And We’re Done!
And that’s how easy and quick it is! The BlackVue DR970X-2CH Plus is ready to give this 2023 BMWiX the premium dash cam protection it deserves! If you think the BlackVue DR970X 2-CH Plus is perfect for your EV, sedan, RV, or your daily driver, do let us know! If you’re looking for an even more secure and discrete setup, this is also available in a Box model, the BlackVue DR970X-2CH Box. You can hide it in the same way we’ve done with the battery pack here!
If you need help from our professional installers, our team at BlackboxMyCar will be happy to help! If you’re in the Richmond area, give us a call to schedule an appointment or directly book here.
BlackVue DR970X-2CH Plus 4K UHD Cloud Dash Cam
4K UHD Resolution | Sony STARVIS 2 | Advanced Parking Modes | BlackVue Cloud Connectivity
Fresh from the oven, the upgraded BlackVue DR970X-2CH Plus now boasts an 8MP Sony STARVIS 2 IMX 678 image sensor for its front camera, improved by an upgraded SigmaStar CPU and Image Processing Software. With three times quicker shutter speed, the DR970X Plus delivers sharper footage, even on busy roads and highways.
Be it configuring the different audio notifications, connecting seamlessly through Bluetooth, or remote notifications through the cloud, BlackVue has you covered. With an optional CM100LTE connectivity module add-on, which you can insert a SIM card directly into, providing an internet connection for the camera whenever it’s operational. Simply connect the CM100LTE to your BlackVue dash cam to provide an always-on 4G LTE connection to the BlackVue Cloud and its suite of unique live features.
Sold out
Hardwire dash cam installation guide
Planning on installing a dash cam in a different car? Check out our Step-by-Step Dash Cam Installation Guide and our selection of handy installation accessories. And if you ever need a hand during the installation process, just call us; our dash cam specialists are available to help!
Looking to have your dash cam professionally installed, we do offer installation services at our Richmond BC location. Mention this and receive 15% off! Book here.
Please see some of our other dash cam installations in the BlackboxMyCar Dash Cam Installation Gallery.