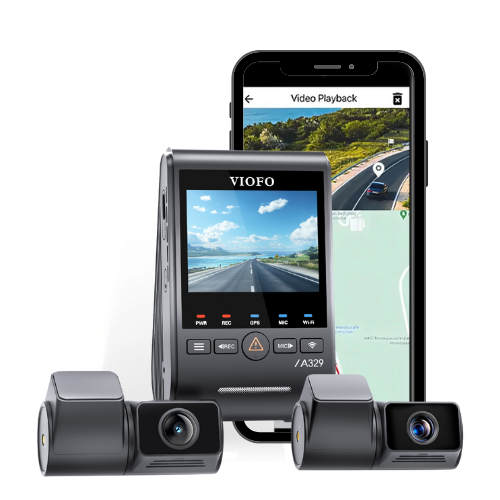
This older article mentions products that are no longer sold. The original names remain for historical context, with current alternatives listed where there is a suitable match.
When it comes to premium dash cams, one of our favourite models is the Thinkware U1000 (now discontinued), a BlackboxMyCar top-seller for years. Even if the new Thinkware U3000 is already in, the Thinkware U1000 still remains a timeless, high-end choice, especially for premium cars like the new 2023 Audi Q4 E-tron, which we recently had in our office for a professional installation.
In this blog, we’re going to show you how we installed a Thinkware U1000 to the Audi Q4 E-Tron, through hardwiring for parking mode.
Yes, we installed a dash cam in an electric vehicle! It’s possible, and if you want to know the truth about dash cams and EVs, see how we debunked the many myths here.
Ensure your dash cam is installed correctly with our Essential Dash Cam Installation Kit. This user-friendly package makes installation easy and hassle-free, allowing you to drive with confidence.
Don't settle for less, protect yourself on the road with our top-quality installation kit today!
The first step, as with any other installation, is to pick where you want to mount your dash cam. For us, the best spot to mount the front dash cam is as close to the center of the windshield as possible, making the unit accessible but still not distracting for the driver, hiding the body behind the rearview mirror if possible.
Since the U1000 dash cam is screenless, we recommend powering the camera temporarily with the cigarette lighter adapter, and then pairing the dash cam with your phone. Through the U1000’s dedicated Thinkware WiFi App, you can live-view from the camera, which will feature horizontal and vertical mounting lines that you can use to find the ideal mounting position and viewing angle for your camera.
Once you have chosen the location, mount the dash cam onto the windshield using the provided adhesive mount. The Thinkware U1000 (now discontinued) comes with an Anti-Glare CPL Filter in every package, so make sure to install this too for clearer footage! Just make sure the camera is level and pointing straight ahead.
Step 2: Locating the fuse and hardwiring
Now that your dash cam is mounted, let’s get it wired! For the Audi Q4 E-Tron, the fusebox is located on the driver’s side, just on the left, below the steering wheel. Starting from the front camera, we wired across from the driver’s side of the windshield, through the headliner, to the side A-pillar.
You can use the pry tool or a flathead screwdriver to remove the plastic trim pieces along the A-pillar. This fusebox runs power off of the accessory battery, and not the main electric battery.
European cars like this German Audi E-Tron have really tight and rigid trims, so this could be one of the tougher challenges when wiring. But with the right tools (and patience), we’re sure you can do it. Just be careful not to damage any of the wires or components while removing the trim pieces, and wire behind/around the airbag as needed. Thinkware’s thin cabling is also quite helpful with this.
The hardwiring cable for the Thinkware U1000 (now discontinued) is a 3-wire connection, with one for ACC (ignition-based), one for constant, and one for a ground connection. Here, we recommend using a circuit tester, like the one that comes with the essential install package to test out different fuses to determine which will be ideal for each connection type. The ground should be a clear unfinished metal connection, such as an existing bolt in the vehicle.
This setup will allow the camera to power on when the vehicle is off of the constant connection, and the ignition connection will tell the camera when the vehicle turns off, and to go into parking mode. The most common ignition connection our installers look for immediately is the Cigarette fuse. Cigarette fuses are normally very consistent in how they operate, and offer a clear way to test their powering parameters.
Remember, the fuse tap that you choose is dependent on the car that you use, from ATO, Micro2, Low-Profile and Mini-Fuse. For this Audi Q4 E-Tron, it actually uses ATO Fuses. Do consult your user manual or vehicle fuse diagram to find which one is right for you, and also, make sure the fuse tap you’re adding is equal to or lower than the existing fuse you’ve chosen.
We also advise you not to use any of the fuse slots used by any of your vehicle's critical components, such as the airbags and engine modules, for safety.
Once you’ve determined an appropriate fuse, we can get to connecting to it, either using the add-a-fuse kit included with your Essential Install Package, or you can wrap the hardwire kit around the legs of existing fuses in the fusebox.
Step 3: Run the rear connecting cable to the rear windshield
1 /
Now, the front unit of the Thinkware U1000 (now discontinued) should already be working, ready to give you that 4K footage. Still, we have to wire the rear camera for maximum coverage.
For this step, connect the rear camera cable to the front camera. We’ll route the cable along the headliner, past the A, B, and C pillars. Continue routing the cable up to the hinge opening of the rear liftgate. Learn more about hatchbacks and SUV installations here.
For easier access, you may want to remove the back panel cover, normally this piece is a snap-in top cover, which will also make routing the wire easier. You can also tuck any excess wiring into the hinge hole, leaving a bit of slack for the hinge when the door opens and closes. Now, we can fish the cable through the rubber grommet, and pull it out the other side.
Same as the front camera, you’ll want to check the live-view of the rear camera before mounting, making sure it’s up and running, and using the positioning lines accordingly.
Step 4: Test the Dash Cam
Of course, after the mounting and wirings, we want to test the dash cam to make sure it's working properly. Turn on the car engine and check if the dash cam turns on automatically. If it doesn't turn on, check the power connections and make sure the dash cam is properly mounted. Also, be sure to initalize the ADAS of your Thinkware U1000 once setup, as it will need to be calibrated to your vehicle.
Step 5: Clean it up
Finally, now that our cameras are installed, and the wires are well-kept, let's return to the fuse box to clean up the wires. You can use electrical tapes or cable clips to keep the cables bundled up, close them and put the cover back.
Now that everything is connected, and the main camera has been connected to our vehicle's fuse box - this means you’re all set to enjoy the convenience of having parking mode. Beyond front-and-rear protection, you can also make the most out of your dash cam experience - through whatever weather - with the BlackboxMyCar Safety Essential Kit (now discontinued). This new bundle from BlackboxMyCar includes all safety-must-have-accessories like the BlackboxMyCar Aqua Shield