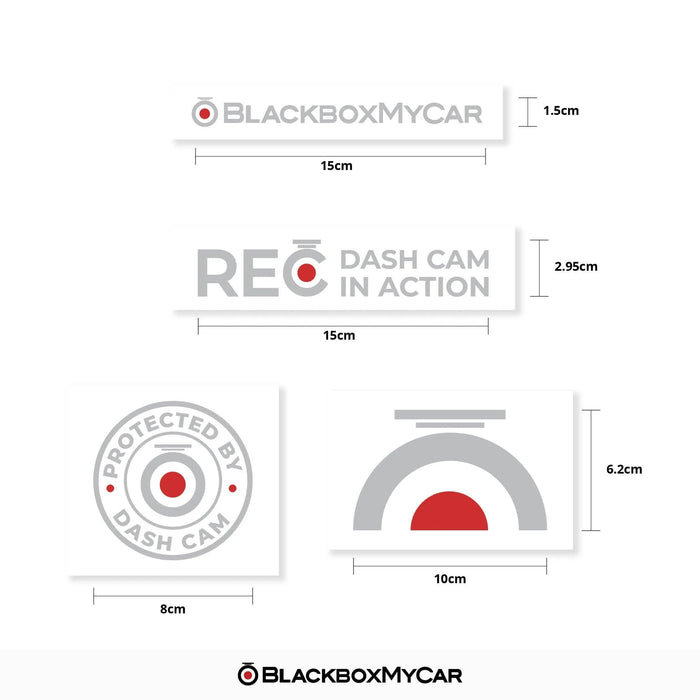
Please let us know via Special Instructions on the Cart Page which 2 decals you would like, if not they will be chosen at random.
Note
BlackboxMyCar Assorted Decals
- Overview
- What's Included
- How to Apply
A Touch of Style
Elevate your vehicle's aesthetic with our premium car decals, designed to add a touch of personality and style. Crafted with precision and vibrant colors, these decals are the perfect way to express your individuality on the road.
A Touch of Style
Elevate your vehicle's aesthetic with our premium car decals, designed to add a touch of personality and style. Crafted with precision and vibrant colors, these decals are the perfect way to express your individuality on the road.
Minimal + Simple
Minimal + Simple
BlackboxMyCar Assorted Decals (2-Pack)
-
2x Assorted Decals (Random)
- Please Note: Let us know via special instructions on the Cart Page which 2 you would like, if not they would be chosen at random
How to Apply the BlackboxMyCar Assorted Decals
Ā
Prepare the Surface:
-
-
Start by cleaning the area of the vehicle where you plan to apply the decal. Use a mild detergent or automotive cleaning solution to remove any dirt, dust, or wax.
-
Dry the surface thoroughly with a clean, lint-free cloth to ensure proper adhesion.
-
Gather Tools:
-
-
We recommend a few basic tools for the application process, including our Vinyl Scraper, and a measuring tape or ruler.
-
Position the Decal:
-
-
Position the decal in the optimal position youād like, measuring it out with a tape measure or ruler.
-
Apply the Decal:
-
-
Once you're satisfied with the placement, peel the backing paper away from the decal, exposing the adhesive side.
-
Peel slowly from one corner of the decal. Put pressure on the decal itself to ensure that it does not separate and lose its form.
-
Once the first side is peeled, carefully align the decal with the desired location on the vehicle, taking care to avoid air bubbles or wrinkles.
-
Starting from one edge, slowly press the decal onto the surface using our vinyl scraper. Work gradually from one side to the other, smoothing out any bubbles or creases as you go.
-
Apply firm, even pressure to ensure good adhesion. Let it rest for a few minutes.
-
Remove Transfer Tape:
-
-
Once the decal is securely applied, carefully peel away the transfer tape, leaving the decal in place on the vehicle's surface. Take your time to avoid lifting or damaging the decal.
-
Final Touches:
-
-
After removing the transfer tape, inspect the decal for any air bubbles or imperfections. If necessary, gently lift the affected area and smooth out any bubbles using the Vinyl Scraper.
-
Allow the decal to cure for at least 24 hours before washing the vehicle or exposing it to harsh weather conditions.
-